








Composting is a simple way to turn everyday food scraps and yard waste into a useful soil amendment. Instead of sending organic material to the trash, you can give it a second life while creating nutrient-rich compost for flowers, vegetables, houseplants, or lawns.
You do not need a large yard or special equipment to begin. With the right container, a good mix of materials, and a little patience, beginners can create compost at home in many different living spaces.
What Is Composting?
Composting is the natural process of breaking down organic materials into a dark, crumbly material called compost. Microorganisms, insects, air, and moisture all help transform items such as fruit peels, leaves, and grass clippings.
Finished compost can improve soil structure, help retain moisture, and add organic matter. It is not a replacement for all soil or fertilizer, but it can be a valuable addition to many gardens and containers.
Choose the Right Composting Method
The best composting method depends on your space, goals, and the type of materials you have available.
Outdoor Compost Bin
An outdoor bin is a practical option if you have a yard. You can buy a ready-made bin or create a simple compost pile in a suitable area.
Look for a location that is:
– Easy to reach throughout the year
– Protected from strong winds
– Partly shaded, if possible
– Close to a water source
– Away from areas where standing water collects
A bin helps keep materials contained and makes the pile easier to manage.
Tumbler Composter
A compost tumbler is a sealed container that can be rotated by hand. Turning the container mixes the materials and adds air without requiring a pitchfork.
Tumblers are often tidy and convenient, but they may hold less material than a traditional bin. They can also dry out or become too wet, so regular checks are still important.
Indoor Worm Composting
Worm composting, also called vermicomposting, uses special composting worms to break down food scraps in a small indoor or outdoor container. This method can work well for apartments and homes without yards.
A worm bin needs bedding, moisture, ventilation, and a suitable location away from extreme temperatures. It also requires different care than a regular compost pile, so beginners should follow instructions for the specific bin and worms they use.
Learn the Two Main Material Groups
A healthy compost pile needs a balance of two basic material groups.
Brown Materials
Brown materials are generally dry and rich in carbon. They provide structure and help keep air moving through the pile.
Examples include:
– Dry leaves
– Shredded paper
– Plain cardboard
– Untreated sawdust
– Small twigs
– Paper egg cartons
– Brown paper bags
Cut or shred larger pieces so they break down more quickly.
Green Materials
Green materials are generally moist and rich in nitrogen. They help fuel the decomposition process.
Examples include:
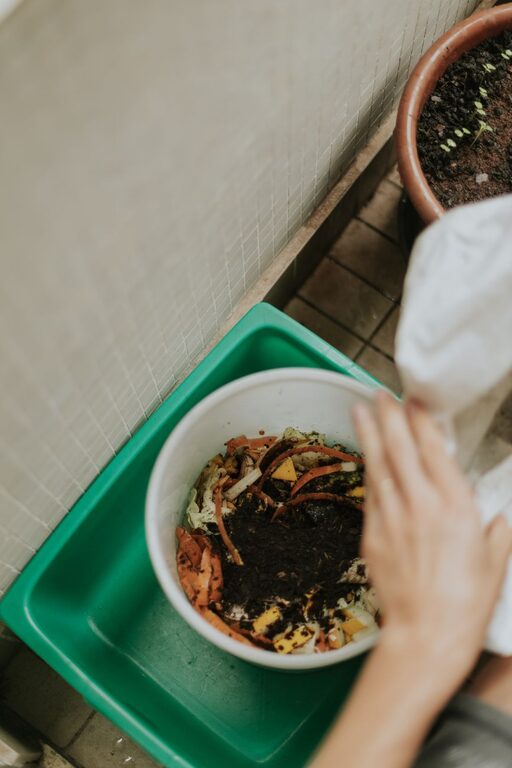
– Fruit and vegetable scraps
– Coffee grounds and paper filters
– Fresh grass clippings
– Fresh plant trimmings
– Tea leaves or tea bags made from compostable materials
– Small amounts of fresh weeds without mature seeds
A common beginner mistake is adding too much food waste at once. When this happens, the pile may become wet, compacted, or unpleasant. Add green materials gradually and cover them with a layer of brown material.
What Should Not Go in a Home Compost Bin?
What you can compost depends on your setup. A basic backyard pile is usually best limited to plant-based materials.
Avoid adding:
– Meat, fish, or bones
– Dairy products
– Oily or greasy foods
– Pet waste
– Diseased plants
– Weeds with mature seeds
– Treated or painted wood
– Coal or charcoal ash
– Glossy paper
– Plastic or synthetic materials
These items may attract pests, create odors, introduce unwanted chemicals, or fail to break down properly.
Some commercial composting services accept items that should not go into a home bin. If you are unsure, check the instructions for your composting system or contact a local waste service.
Build Your First Compost Pile
Start with a layer of coarse brown material, such as small twigs or dry leaves. This helps air enter from the bottom.
Next, add alternating layers of brown and green materials. There is no need to measure every ingredient precisely, but aim for more brown material than green material by volume. A useful starting point is roughly two or three parts brown materials for each part green material.
Follow these steps:
- Add a base layer of dry, coarse material.
- Add a layer of fruit and vegetable scraps or other green material.
- Cover the green layer with brown material.
- Add a small amount of water if the pile feels dry.
- Repeat the layers as materials become available.
- Turn or mix the pile occasionally to add air.
Keep food scraps toward the center of the pile and cover them with leaves, paper, or other brown materials. This can help reduce odors and discourage pests.
Monitor Moisture and Air
Moisture and oxygen are two of the most important conditions for successful composting.
A compost pile should feel similar to a wrung-out sponge. If it is dusty and dry, add a little water and mix the materials. If it is soggy, add dry leaves, shredded cardboard, or paper and turn the pile.
Air helps beneficial organisms work efficiently. Turn the pile every week or two, or whenever it looks compacted. A pitchfork, shovel, or compost aerator can make this task easier.
You do not need to turn the pile every day. Regular mixing is helpful, but a compost pile can still break down with less frequent attention.
Solve Common Composting Problems
Bad Odor
A strong unpleasant smell usually means the pile is too wet, too compacted, or contains too much green material. Add dry brown materials and turn the pile to improve airflow.
The Pile Is Not Breaking Down
A slow pile may be too dry, too cold, or made of materials that are too large. Add moisture, mix the contents, and cut large pieces into smaller sections.
Composting also slows during cold weather. This is normal, and the process will often become more active when temperatures rise.
Fruit Flies or Other Pests
Fruit flies are often attracted to exposed food scraps. Bury scraps in the center of the pile and cover them with brown material. Avoid adding meat, dairy, or greasy foods to a basic backyard bin.
A secure lid can help, but a well-balanced pile is also important. Too much wet food waste can create conditions that attract pests.
Know When Compost Is Ready
Finished compost is usually dark brown, crumbly, and earthy-smelling. Most of the original materials should no longer be recognizable, although a few small pieces may remain.
Depending on the materials, weather, and management, compost can take several months or longer to finish. Do not worry if the process seems slow. Composting is a natural process, and patience is part of the routine.
Before using compost, remove any large pieces that have not broken down. You can return those pieces to the bin for another cycle.
How to Use Finished Compost
Use finished compost in several ways:
– Mix a small amount into garden soil before planting.
– Add it around established plants as a surface layer.
– Blend it into potting soil in modest amounts.
– Spread a thin layer over lawns or garden beds.
– Use it to improve soil that is compacted or low in organic matter.
Avoid planting directly in pure compost. Mixing compost with existing soil or a suitable potting mix creates a better growing environment for most plants.
Start Small and Keep It Simple
The easiest way to build a lasting composting habit is to start with a manageable system. Choose one bin, learn which materials work well, and observe how the pile changes over time.
Keep a supply of dry leaves, shredded cardboard, or plain paper nearby so you can cover food scraps as needed. With basic care, your kitchen and yard waste can become a useful resource instead of ending up in the trash.